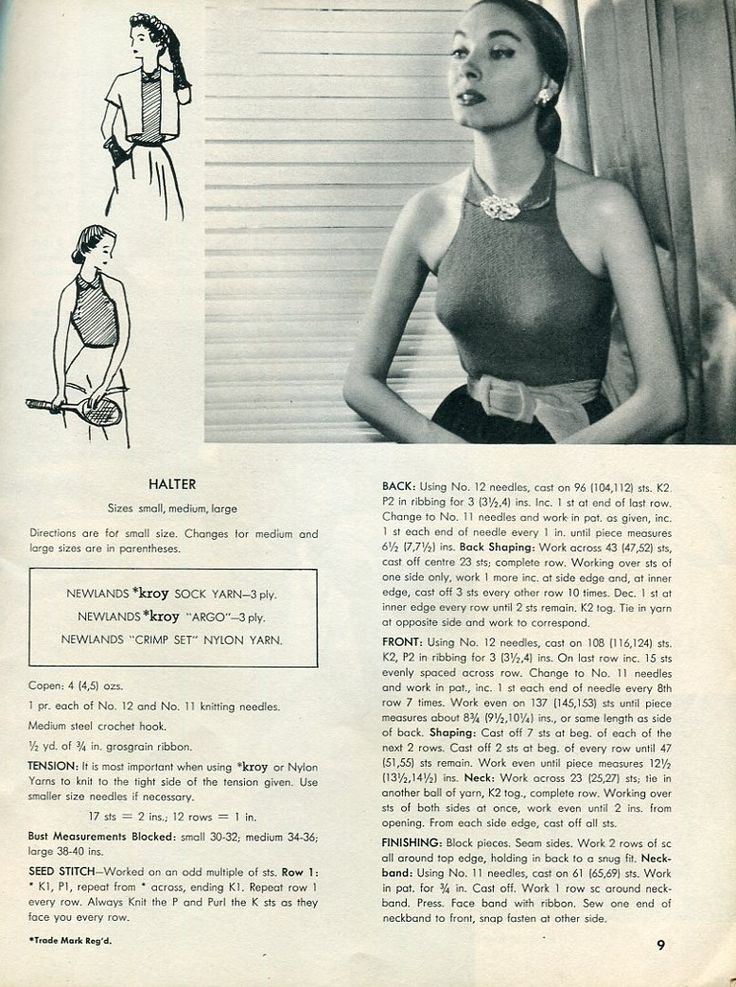
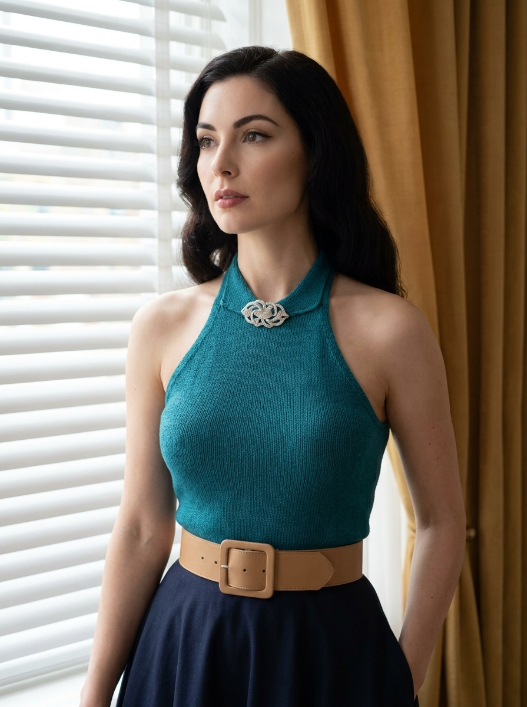
This vintage halter top knitting pattern creates a fitted sleeveless top with a high halter neckline, shaped sides and a narrow knitted neckband. The simple seed stitch gives the fabric a fine, understated texture while the close-fitting silhouette has the unmistakable look of a classic 1950s knitted top.
The original pattern is written for three bust sizes and uses vintage 3-ply yarn. Because vintage yarn and needle classifications do not always correspond exactly to modern equivalents, choose a yarn and needle combination that gives the required gauge rather than relying on the old yarn name alone.
Sizes
Directions are for the small size, with changes for medium and large given in parentheses.
Finished bust measurements after blocking:
- Small: 30–32 in.
- Medium: 34–36 in.
- Large: 38–40 in.
Materials
- Vintage 3-ply yarn or a modern yarn that gives the required gauge
- Yarn required: 4 (4, 5) oz.
- One pair No. 12 knitting needles
- One pair No. 11 knitting needles
- Medium steel crochet hook
- ½ yd of ¾-in. grosgrain ribbon
Important: No. 11 and No. 12 are the original vintage needle sizes. Because historical needle numbering systems vary, use the needle size necessary to achieve the stated gauge rather than relying on a direct modern conversion.
Gauge
17 sts = 2 in.
12 rows = 1 in.
Work a gauge swatch before beginning, particularly if substituting a modern yarn.
Abbreviations
- k: knit
- p: purl
- st(s): stitch(es)
- inc: increase
- dec: decrease
- k2tog: knit 2 stitches together
- sc: single crochet
- pat: pattern
Seed Stitch Pattern
Worked over an odd number of stitches.
Row 1: *k1, p1; repeat from * across, ending k1.
Repeat Row 1, always knitting the purl stitches and purling the knit stitches as they appear on the needle.
Back
Using No. 12 needles, cast on 96 (104, 112) sts.
Work in k2, p2 ribbing for 3 (3½, 4) in.
Increase 1 st at the end of the last row.
97 (105, 113) sts.
Change to No. 11 needles and work in seed stitch.
The original pattern now instructs:
Increase 1 st at each end every 1 in. until the piece measures 6½ (7, 7½) in.
Important Note About the Original Back Shaping
There is an arithmetic inconsistency in this vintage instruction.
The following Back Shaping section requires 109 (117, 127) sts, because the back is divided as follows:
43 (47, 52) sts + 23 centre sts + 43 (47, 52) sts = 109 (117, 127) sts.
However, beginning with 97 (105, 113) sts after the ribbing, the instruction to increase at each end every 1 in. over the stated length does not produce those required stitch counts.
For this reason, the increase interval in the original pattern should be treated with caution. If reproducing the garment, the important target before beginning the Back Shaping is:
109 (117, 127) sts.
Back Shaping
Work across 43 (47, 52) sts, cast off the centre 23 sts, then complete the row.
You will have 43 (47, 52) sts on each side.
Working on one side only, continue for 1 in. more.
At both the side edge and inner edge, cast off 3 sts every other row 10 times.
Decrease 1 st at the inner edge on every row until 2 sts remain.
k2tog.
Fasten off.
Join yarn to the opposite side and work to correspond.
Front
Using No. 12 needles, cast on 108 (116, 124) sts.
Work in k2, p2 ribbing for 3 (3½, 4) in.
On the last row, increase 15 sts evenly across.
123 (131, 139) sts.
Change to No. 11 needles and work in seed stitch.
Increase 1 st at each end of every 8th row 7 times.
You will now have:
137 (145, 153) sts.
Work even until the piece measures approximately 8¾ (9½, 10¼) in., or until it is the same length as the side of the Back.
Front Shaping
Cast off 7 sts at the beginning of each of the next 2 rows.
123 (131, 139) sts remain.
Cast off 2 sts at the beginning of every row until 47 (51, 55) sts remain.
Work even until the piece measures:
12½ (13½, 14½) in.
Neck
Work across 23 (25, 27) sts.
Join another ball of yarn.
k2tog, then complete the row.
You now have 23 (25, 27) sts on each side of the neck opening.
Working both sides at the same time with separate balls of yarn, work even until the neck opening measures 2 in.
Cast off all stitches from each side edge.
Neckband
Using No. 11 needles, cast on 61 (65, 69) sts.
Work in seed stitch for ¾ in.
Cast off.
Work 1 row of single crochet around the neckband.
Press carefully and face the band with grosgrain ribbon.
Sew one end of the neckband to the front and attach a snap fastener at the other side.
Finishing
Block the knitted pieces to the required measurements.
Sew the side seams.
Work 2 rows of single crochet around the entire top edge, drawing in the Back slightly so that it fits snugly.
Attach the finished neckband as described above.
Pattern Notes
This vintage knitted halter is designed with considerable shaping. The Front begins wider than the Back and is increased further before the dramatic side shaping creates the narrow upper section and high neckline.
The Front stitch arithmetic checks correctly:
108 (116, 124) sts
- 15 sts = 123 (131, 139) sts
- 14 sts from seven paired increases = 137 (145, 153) sts
After casting off 7 sts at each side:
137 (145, 153) − 14 = 123 (131, 139) sts
The subsequent 2-stitch cast-offs reduce the Front to the stated:
47 (51, 55) sts
The neck division also checks:
47 sts → 23 sts + decrease over the remaining 24 sts → 23 sts each side
51 sts → 25 sts + decrease over the remaining 26 sts → 25 sts each side
55 sts → 27 sts + decrease over the remaining 28 sts → 27 sts each side
The Back division also checks mathematically at the shaping point, provided you have:
109 sts = 43 + 23 + 43
117 sts = 47 + 23 + 47
127 sts = 52 + 23 + 52
The questionable part of the original pattern is therefore specifically the Back increase interval, not the later shaping counts.
Working With a Vintage 3-Ply Yarn Pattern
The original yarns listed for this pattern are discontinued vintage yarns. Rather than choosing a modern yarn simply because it is labelled “3-ply,” make a swatch and choose a yarn and needle combination that produces the required 17 stitches over 2 inches.
Getting the stitch gauge right is especially important for this fitted halter because even a small difference in gauge can noticeably alter the finished bust measurement and fit.
Original Vintage Halter Pattern